Over the last 18 months or so, Microsoft Teams has proven to be invaluable to many businesses. Its use as a video conferencing and collaboration tool has allowed colleagues and clients to communicate with one another even when they are unable to meet in person.
However, unless you are a lightning-fast note-taker, you are unlikely to be able to record the input of your Teams meeting participants in real-time. Furthermore, there will be times when it is simply not possible to get everyone who needs to be on a Microsoft Teams call. If that’s the case, having the ability to record a meeting so you can review it later is critical.
Fortunately, Teams includes the ability to record meetings in its free plan. However, for inexperienced Teams users, it may be unclear how to record a meeting. You’ve come to the right place if you’re unsure. This guide will walk you through the process of recording a Microsoft Teams meeting step by step.
Check first, Who is Allowed To Record
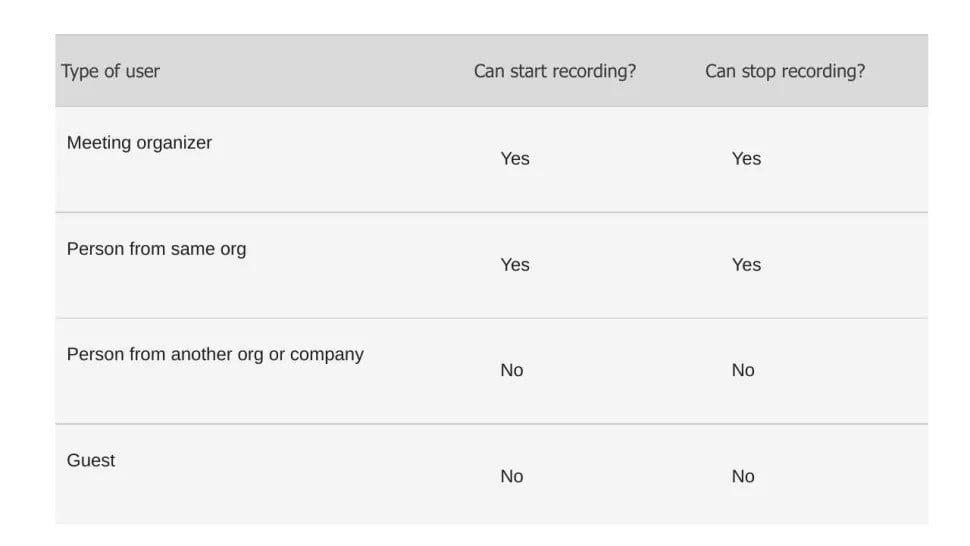
Although all Teams meetings can be recorded, any meeting participant cannot begin a recording. First, your IT administrator must enable meeting recordings. Another thing to keep in mind is that guest users cannot record meetings. In fact, Microsoft imposes a few other restrictions as well.
Meeting organizers and individuals from the same organization can essentially start and stop recordings. Even so, this does not preclude external meeting participants from accessing recordings. Microsoft has begun saving Teams recordings in OneDrive and SharePoint since January 2021, making it simple to download and share your recordings with individuals both inside and outside your organization.
Start Recording
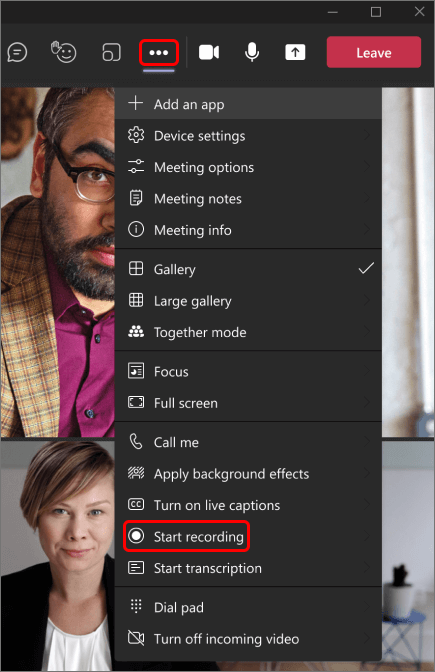
Unsurprisingly, in order to record a Teams meeting, you must first attend one. So, join or start a meeting, and then click the ellipses in the meeting control panel’s “More actions” section. You should see “Start recording” in the dropdown list that appears. When you click that, everyone in the meeting will be notified that a recording is being made.
Keep in mind that only one meeting participant has the ability to record a meeting. The recording, however, will continue even if the person who started it leaves. The recording will stop once everyone has left the meeting. If a participant fails to exit the call, the recording will automatically end after four hours.
Stop Recording

There may be times when you want to pause your Team’s recording before the meeting has concluded. If that’s the case, finishing your recording should be a breeze. Simply return to “More actions” and choose “Stop recording.” Alternatively, you could simply pause the live transcription while continuing to record.
Where to find your Recording’s
It’s one thing to successfully record your Microsoft Teams meeting, but it’s useless if you can’t find it. As previously stated, depending on the type of meeting, Teams recordings can now be found in either SharePoint or OneDrive. The recording will be processed and saved to SharePoint if it was a channel meeting. Any other type of meeting will be held on OneDrive.
Meeting attendees will also receive a link to the recording in the relevant chat or channel for their convenience. By clicking the link, you will be taken to either SharePoint or OneDrive, where you can download or preview the recording. It is also simple to share the recording with anyone else, regardless of whether they attended the meeting or not. Simply click the “Share” link in SharePoint or OneDrive and enter the information for the person you want to share the recording with. If you were the meeting organizer, you can also delete the recording from this screen.
Set a expiration date for your Recordings
Having recordings of Teams meetings lying around could pose a significant security risk, especially as more businesses share sensitive information remotely. With that in mind, it’s a good idea to delete recordings as soon as you no longer require them, but doing so manually is an added inconvenience – and one that’s easy to overlook. It is possible, however, to automate the deletion of your recordings.
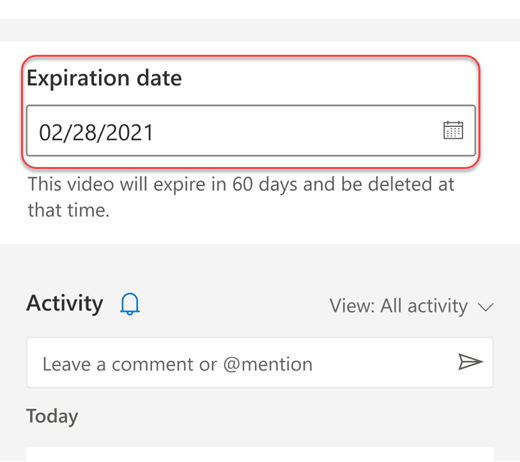
If your recording has an expiration date, Teams users will be notified when the meeting concludes. If you want to change the date, go to the details page. You can get to the details page by clicking on the recording and then clicking the info icon in the top right corner, or by finding the recording file in SharePoint or OneDrive and then clicking “Details.” A drop-down menu with options for extending the expiration date can be found on the details page. Alternatively, if your video is not of a sensitive nature, you could choose to remove the expiration date entirely.